So weeks back, I successfully bricked my Huawei Honor 6 while trying to flash an Android Marshmallow update and I went into pseudo depression as I was broke. As luck would have it, my Adsense payment came through just as Oukitel started a promo of sorts for their phones thus I landed the Oukitel K4000 PRO for $99. Thankfully it didn’t get lost in transit (NIPOST issues) as I decided to skip DHL shipping considering the price of the device and ……..
I’m still setting up the device and I’m through with the video battery life test. Hopefully I’ll get the daily usage battery life sorted out soon and then I’ll do a quick review of the device.
For now, I’d like to show you guys how to flash the Oukitel K4000 PRO using a recent version of SP Flash Tools. I believe this guide should work for all Oukitel smartphones running on Mediatek MT6735M processor.
It seems Oukitel hasn’t launched OTA updates yet as that’s the reason why I had to flash my phone. The device came with a January 2016 OS meanwhile an OS update for March 2016 was out but the OTA service kept telling me my device was up to date.
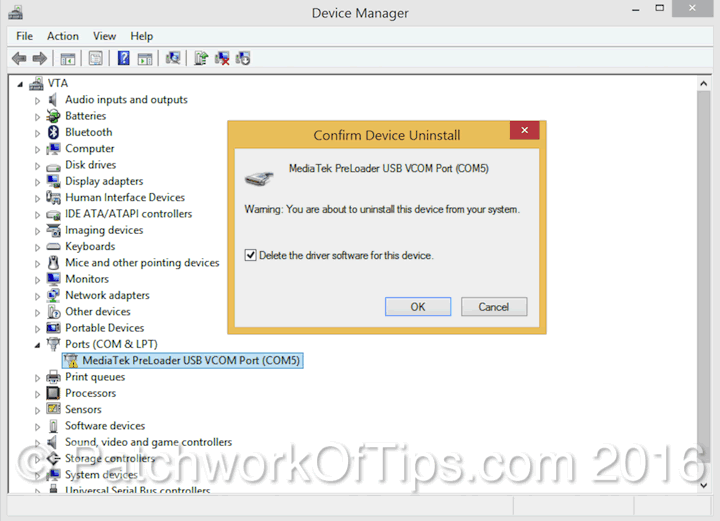
NOTE: My computer is already setup with Mediatek and android drivers for flashing the Lenovo P780. In other to get the Oukitel K4000 PRO flashing process to run, I had to uninstall/delete the MediaTek Preloader USB VCOM Port driver.

So here is what is going to happen. Just follow the steps below to flash your phone. If it doesn’t work and you have other mediatek drivers installed on your system, just uninstall them like I did above and try again.
UPDATE 14th July 2016: The guide in continuation also works for the Oukitel K6000 Pro too. Somehow my device got infected with a malware that kept prompting me to install funny apps at random and thus I had to wipe the device by flashing it.
The sad thing though is that I flashed the latest firmware as at today and the latest firmware has the Quick Settings feature blocked. I really miss it.
Table of Contents
STEP 1
Download SP_Driver_v2.0, SP_Flash_Tool and Oukitel K4000 PRO ROM or Oukitel K6000 PRO ROM
STEP 2
You need to disable driver signature enforcement in Windows 8/8.1 and Windows 10 so that you can successfully install the drivers.
Go to PC Settings from the start menu >> Update and Recovery >> Recovery.
Under Advanced Startup, click on Restart Now.
Your PC will do a kind of reboot and go to a blue Choose an option screen. Click on Troubleshoot (refresh or reset your PC or use advanced tools) >> Advanced Options >> Startup Settings (change windows startup behaviour) >> Restart.
Your PC will now restart and go to yet another blue screen with 10 options. Press 7 or F7 on your keyboard to select Disable driver signature enforcement.
Your PC will then reboot with driver signature enforcement disabled.
STEP 3
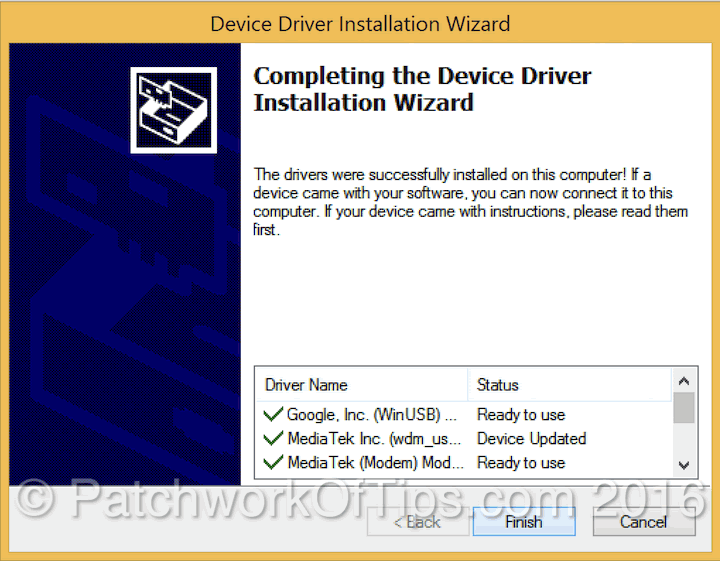
Extract the files you downloaded previously and run DriverInstall.exe which is in the SP Driver 2.0 folder.
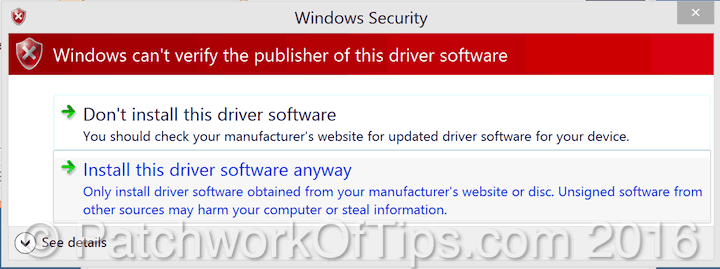
During the driver installation process, you will get several prompts like the one below. Simply click on Install this driver software anyway each time.
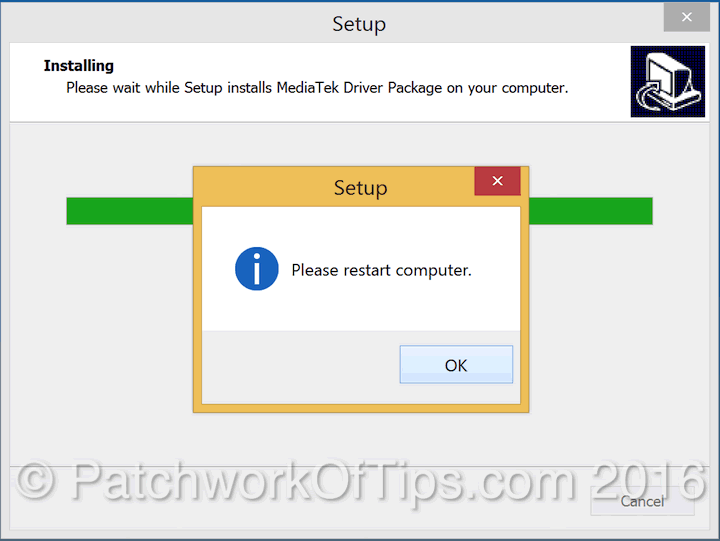
Once driver installation is complete, restart your computer.
Step 4
Please make sure you’ve backed up your data completely. Data stored on the SD card isn’t touched but you never can be too sure, so it’s best you back up to your computer or a USB flash drive.
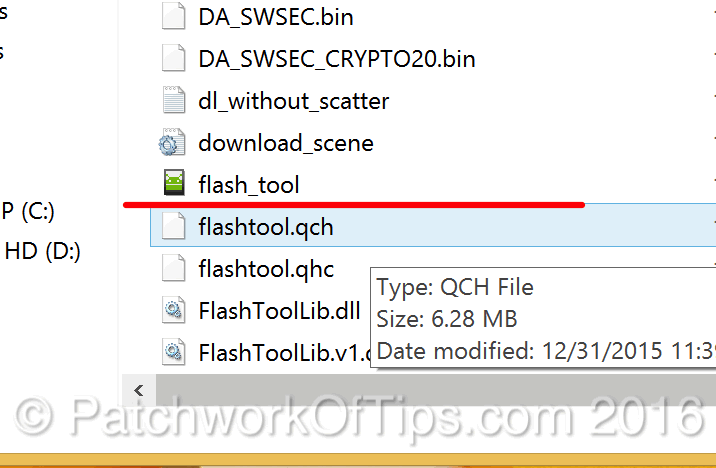
Go to the SP Flash Tool folder and run flash_tool.exe
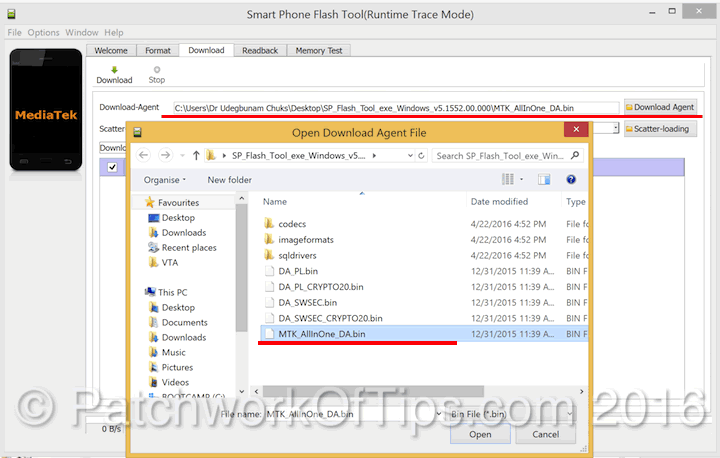
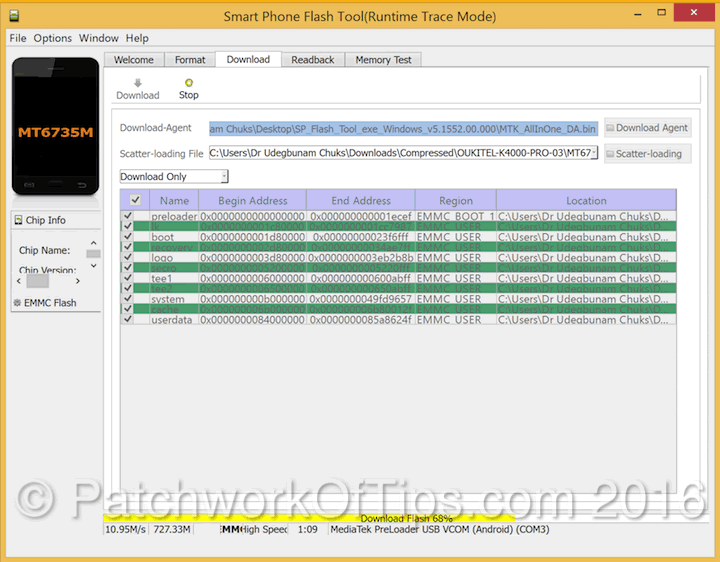
Click on Download Agent and select MTK_AllInOne_DA.bin which you’ll find inside the SP Flash Tool folder.
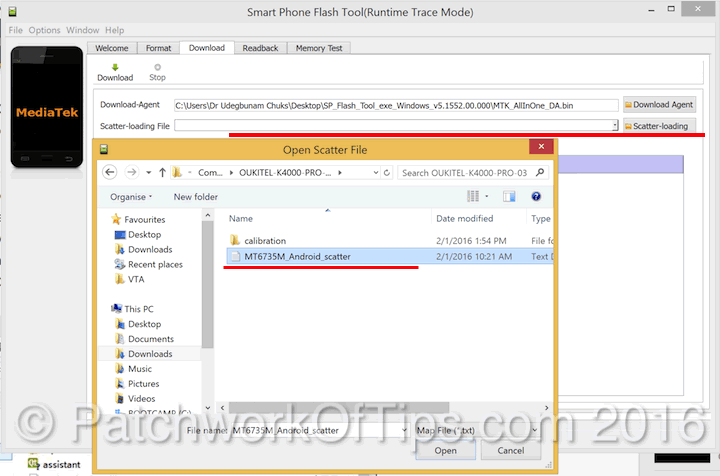
Click on Scatter-loading and select MT6735M_Android_scatter which you’ll find inside the Oukitel ROM folder.
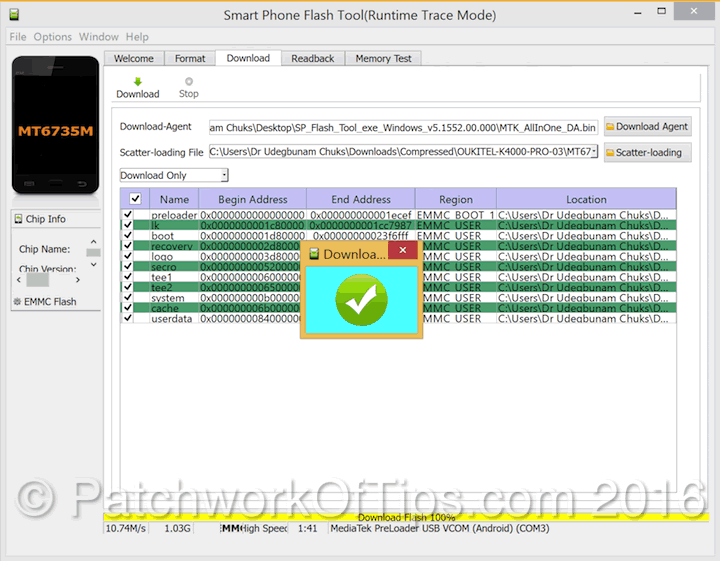
Switch off your phone, connect it to the computer and immediately hit the download button just beside the stop button (sorry I forgot to mark it).
If all goes well, you will see a yellow progress line that says Download flash … at the bottom as shown below. Set your phone down and touch nothing until the process is complete.
NOTE: I had to switch USB ports several times before the damn thing started flashing. You might be lucky and not face that ish at all.
Once the flashing process is complete, simply disconnect your phone and start it.
The Marshmallow update should be out any time soon as they promised. I just hope they make it available via OTA as I wouldn’t want to go through the process of flashing the update and setting up my phone from scratch again.
Please, please, please, if this guide works for you, do leave a comment to let me know. Thanks.
You’ll also like:
Please share this article to help others. Thanks
