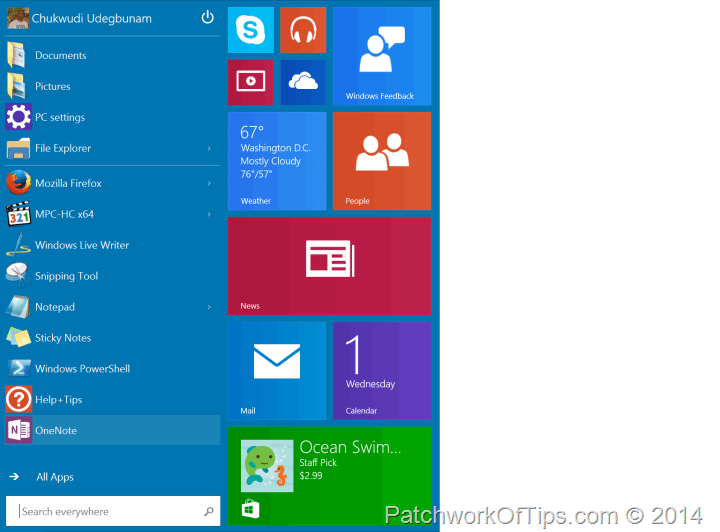
Just like Apple did months back with the announcement of OS X Yosemite, Microsoft has officially opened the beta testing of its upcoming OS; Windows 10; to anyone who cares to give it a spin. I just successfully upgraded my October 2013 13” Retina Macbook Pro Bootcamp partition to Windows 10 Technical Preview without a fuss and so far so good nothing seems to be broken.
Installation is pretty easy though as always I recommend you back up your Mac OS X and Windows partition should in case something goes wrong. I upgraded from Windows 8.1 Pro to Windows Technical Preview.
NOTE: Until its scheduled launch mid 2015 or thereabout, Windows 10 for now will be known as Windows Technical Preview. Just wanted to clear that up for those that might be confused. They are the one and the same software.
You have to be logged into the bootcamp partition on your Macbook to proceed. I’m guessing it’s safe to say that Windows 10 is only compatible with Bootcamp 5. If you’re one of those that installs Windows on their Mac using apps like VMware Fusion or Parallels Desktop, this guide won’t help you. Just hang in there for instructions on how to update your virtual machine to Windows 10 to be officially released by the app developers.
UPDATE: The team at Parallels Desktop have posted a guide on How to install Windows 10 Technical Preview in Parallels Desktop 10 Bootcamp users please continue reading below
Step 1
Sign up for Windows Technical Preview. If you don’t want to, you can go right ahead and download the appropriate Windows Technical Preview ISO file for your system.
Step 2
Download and install Windows 7 USB/DVD Download Tool and burn the ISO file you just downloaded to a USB drive (8GB minimum) or DVD
Step 3
Open the USB flash drive or DVD you just burnt. Click on setup and follow the prompts to begin the installation process. It should take like 15 – 20 minutes and a few restarts and then you should be good to go.
That’s all there is to it. Like I said, it was easy breezy.
I wasn’t prompted to provide a product key and that’s probably ‘cause I had Windows 8.1 Pro Full version installed previously. If you get a request for a product key/license make use of NKJFK-GPHP7-G8C3J-P6JXR-HQRJR as was provided on the ISO download page.
One thing I’ve noticed and liked is that you can adjust the size of the Start Menu as well as the size of the tiles. Also no more Windows 8 start screen. Everything is on the desktop just like in Windows 7.
Windows 10 Notification center doesn’t seem to be working yet but I just got this twitter alert notification in the top right hand corner of my screen. Clicking on the notification takes to straight to the tweet on the Twitter for Windows app
Windows Store and Twitter for Windows 10 have crashed on me once but a restart of the system got them working again
WARNING: If your daily affairs is tied to your PC, do not perform the upgrade as it could break something that you can’t do without it on a daily basis. In other words, Windows 10 Technical Preview cannot be trusted as a daily driver.
UPDATES:
- Norton Internet Security doesn’t work on Windows 10 just yet. I even downloaded Norton Security Beta 2015 and at the point of installation I got a compatibility error alert thus I had to uninstall it and settle for the default Windows OS protection; Windows Defender. I’m not too bothered about this anyway as I work mainly in Mac OS X environment these days and I don’t plan on visiting any seedy sites.
You’ll also like:
Please share this article to help others. Thanks

